
 Basic Climbup Insect Interceptor – Setup, Use, and Benefits for Mosquito Surveillance">

Recommendation: This practice can help working professionals maintain timely inspections; inspect climbup device at dawn; verify mounting height 1.5 m; check battery status; inspect trap integrity; black body improves visibility in shade; then plan the next check.
During inspections, inspect sample tubes; check dots forming cues; ensure legs of the support are secure; smaller components require tighter tolerances. Unlike reactive methods, this routine yields proactive results; having a record of incidents help customers track risk.
In field conditions, place black climbup near a sheltered spot; monitor incidence fluctuations; having a consistent inspection cadence makes trends visible; While professionals expect data stability over 90 days.
Implementation notes emphasize visibility; climbup casing supports quick spot checks; inspections yield reliable counts; customers request documentation; therefore maintain transparent records; share results with stakeholders; inspection data help risk mapping.
Monthly Testing Protocol for High-Risk Hotels
Implement a fixed monthly testing protocol using line-based traps positioned on every guest floor; begin at 08:00 on the first business day; coverage includes lobby zones, corridors, stairwells, service areas; back-of-house zones must be included.
- Placement: mount line devices at 3 feet above floor level; place between high-traffic areas to maximize exposure; secure to prevent tampering.
- Calibration: perform a 15-minute verification right after installation; check signal clarity; adjust height if heat sources distort readings.
- Sampling cadence: execute sampling during the first week of each month; data collection weekly thereafter; frequency increased if activity indicators rise.
- Processing: wash collection containers; label by zone, floor, device ID; transfer to lab or on-site analysis station.
- Turnaround: processing of each sample must occur within the next minute after retrieval to preserve integrity.
- Detection cues: monitor for unusual activity patterns; very small numbers in springs near entrances can indicate early ingress; these clues guide the next steps.
- Escalation: if valpas alerts trigger, notify on-site professionals; giving their containment plan with hotel management; quick cleaning in affected zones; consultation with relevant departments.
- Contingency measures: canine-assisted checks may be scheduled as an optional supplement; results influence spraying plans; although optional, this step provides extra confirmation.
- Environment controls: raise cleaning standards; increase wash routines; monitor humidity; temperature around line stations; heat mapping helps identify hot spots; sure data integrity; either method confirms findings.
- Documentation: maintain a flawless log; include date, times, personnel; outcomes; between checks ensure backups exist; transparency for inspections.
- Training: provide quick briefing to staff; ensure human activity is minimized during sampling; provide clear pointers on safety; privacy guidelines.
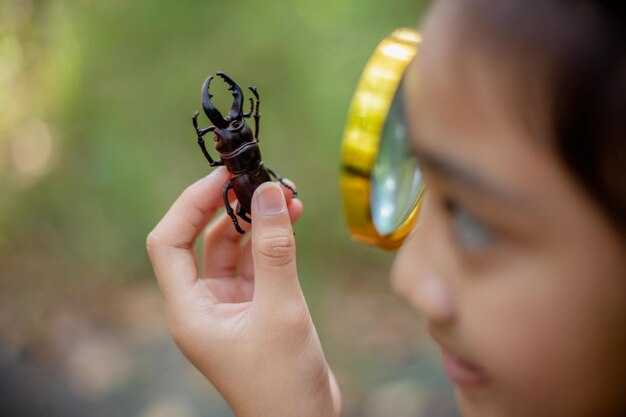
Unpacking, assembling, and mounting the Climbup Interceptor correctly

Begin with a concise inspection of all items included; verify five components present; mounting bracket, screws, base, body, capture surface; ensure each piece is clean; a black finish is visible.
Unpack in a clear area; keep the brand guide handy; place all parts on a flat spot in front of you; if staff have questions, refer to local guidelines.
Attach mounting bracket to base using screws; align holes; tighten until firm; avoid overtightening. Verify size compatibility. The climbup unit mounts securely when bracket is level.
Choose a front-facing, solid surface at a height within reach of local staff; five common spots include front desk, hallway wall near hospitality rooms, outside service entries, commercial kiosks, lobby corners.
Locate a location that keeps capture surface visible, not shaded by glass; ensure front view is clear; avoid glare from lighting; cleaning simplifies tasks, making checks easier.
Ongoing checks cover multiple locations; five minutes per location; each location yields incidence data; logs provide a clear view.
Problems seen: loose screws, tilt, blocked airflow, glare, moisture; remedy: re-tighten, relevel; recheck orientation.
After mounting, verify personal safety measures; check stability; confirm no interference with hotel operations; maintain monitors within hospitality network; raise awareness among hotel teams using reliable technology.
Optimal placement and installation checklist for interior entrances and outdoor lobbies
Install the climbup-compatible trap unit at two anchor points: front interior entry; adjacent outdoor lobby; mount on a smooth wall or sturdy column 1.0–2.0 meters (3–6 feet) from the floor; maintain a clean 0.5 meter clearance from desks, couches; avoid direct sunlight, heat vents, crowded seating.
Interior entrances: position within 1.0–1.5 meters from the threshold to capture air entering; avoid corners behind the desk; test with door opening patterns; inspections daily; logs updated for monitoring results.
Outdoor lobbies: select sheltered overhangs that direct air toward entry points; shield from rain using weatherproof housings; maintain 1.0–2.5 meters from curbside traffic; ensure foot traffic does not bump the unit; Likely air flow patterns shift with weather; Sometimes seasonal variations require repositioning.
Installation steps: inspect mounting material (concrete, brick, plaster, wood); choose appropriate anchors; affix unit level; route cables along edges; ensure unobstructed egress, signage vicinity.
Maintenance routine: weekly checks; inspect for trapped specimens, dust, corrosion; cleaned surfaces with a soft cloth; systems inspected weekly; avoid solvents; plan replacements after 60–90 days in humid environments; log actions at the desk for audit trails. Regular install checks help ensure continued operation.
Market fit and guest experience: staff aware training at front desk; housekeeping crews; thousands of hotels, motels, other properties adopt this layout; observe trends in bitten incidents among guests; once issues appear, adjust placement within days; these measures reduce psychological stress for guests.
Example applying this plan: in a motel front area with exposed couches, a desk; the unit near the front door captures rising air; regular cleaning of mattresses, cushions improves performance; staff aware of changing conditions; after years of use, reposition within seasons; smart sensors report status to the desk.
Final checklist: ensure installation remains inspected after cleanings, during shutdowns, or brand changes; verify constraints before guest check-in; confirm 0.5 to 2.0 meters height; verify 0.5 meter from seating; verify front desk path; verify couch distances; verify material compatibility; verify climbup label is clear.
Operational timing, weather considerations, and maintenance during peak mosquito seasons
Begin checks at first light and again near dusk; this window is quite productive, yielding thousands of captures and a minimum 60-minute gap between sessions preserves data quality. Note the presence of nymph-like stages in standing water; small larvae may crawl along container rims, log these signs in a reviews log to support trend analysis. Continue routine housekeeping of the monitoring unit; this is an essential part of field operations.
Weather considerations: Hot, humid days drive biting-insect activity; schedule checks when temperatures range 18–34 C and humidity exceeds 60%. Avoid outdoor checks during heavy rain or strong winds; wind speeds above 5 m/s reduce landing rates. There is present risk of rapid infestations if forecasts miss a rain event, therefore align field work with reliable weather alerts to protect staff and data quality.
Maintenance practices: Clean unit housings and sampling surfaces daily; replace lures and batteries on a weekly cycle; verify that water traps are kept away from bathrooms and hotel grounds where thousands of tourist-related tasks occur. Ensure housekeeping teams keep nearby bathrooms free of standing water; this helps eliminate new breeding sites. Standard procedures include calibrations and data export to partnerships; this is essential for keeping infestations under control.
Partnerships and safety: coordinate with hotel teams and tourist operators to align cleaning cycles with trap checks; present data to travel managers and health staff; this supports a standard, low-harm program that protects guests and reduces infestations.
Testing, immune considerations, and treatments: Conduct regular testing of device performance; record thousands of field logs; reviews from staff highlight trends; notice early shifts in activity; the data continue to guide season-long actions. Integrate immune-aware messaging and practical treatments in community outreach, as a complement to field work.
| Condition | Action | Frequency | Rationale |
|---|---|---|---|
| Temperature 18–34 C | Schedule checks within this window; ensure lure intensity remains stable | Daily during peak season | Elevates activity, improves capture yield |
| Humidity >60% | Monitor moisture in collection cups; replace damp filters | Daily | Increases capture rates |
| Rain events (recent 6–12 h) | Postpone outdoor monitoring; inspect proximate water sources | As conditions occur | Standing water fosters breeding sites |
| Wind >5 m/s | Postpone checks at exposed sites | As needed | Reduces flight activity; lowers data noise |
| Nearby pesticide applications | Coordinate with authorities; isolate monitoring area | As needed | Minimizes harm to non-targets; helps eliminate infestations |
Sample handling workflow: collection, labeling, storage, and transport to the lab
Begin collection thoroughly; seal each sample in a leakproof container; label with a unique ID, date, time, location, trap type; attach label to exterior so condensation does not obscure text; when a shipment went through a humid route, note travel time and container condition; crawling organisms may be present, which requires tighter handling.
Labeling details: use durable, water resistant labels; include facility code, primary initials, monthly sequence, plus a clear description of the collection point; verify readability after cleaning; notice label integrity also when surfaces show moisture; this helps traceability; record which samples were taken at which location.
Storage steps: place samples in sealed secondary container inside a clean cooler; maintain temperature at 2-8°C; avoid temperatures above 25°C; keep away from pesticides; avoid contact with bedding or other textiles to prevent cross-contamination; separate bedding from the outer packaging to reduce full-blown contamination; wipe inner surfaces before reuse; record the temperature at sealing; notice any leakage; cleanliness remains essential even in bathrooms.
Transport to the lab: plan a short travel route; use insulated package with a black liner to limit light exposure; maintain constant temperature during transit; deploy a rigid frame outer case to prevent crushing; document chain of custody each shipment; include sender, route, expected arrival, actual time; upon receipt, log the sample into the system; monthly checks differ from routine checks; this travel opportunity supports faster results; psychological comfort of staff helps preserve data integrity, making the mature workflow more reliable.
Data capture and reporting: documenting results and communicating with hotel management
Recommendation: Implement a standardized nightly data template to capture observations at five locations: headboard; springs; behind bed; behind nightstand; travel corridor in guest rooms. Record presence indicators such as bloodstains; probable sightings; photos; time stamps; notes.
Weekly digest surfaces location density; beds showing signs; risk levels; customer impact; psychological implications; cost implications; required resources.
Protocol requires immediate escalation when bloodstains present; probable signs reach threshold; high-risk locations include behind headboard; springs; next steps: lead investigator collects notes; schedule follow-up checks; management receives next-day summary to present action plan.
Structured reporting makes decisions easier during peak travel weeks; early detection lowers cost by containing bedbugs risk within locations; a higher focus on risk communication improves management awareness; pre-written templates ease sharing with hotel leadership; staff said the process supports psychological calm among customers; team reports smoother operations.
When bedbugs present; protocol instructs intensified sampling; tighter coverage around headboard; rolls of tissue; follow-up checks within five days to confirm reduction; if hundreds of rooms show signs; escalate to regional leadership.
Record locations with high signal: behind headboard; bed frame springs; travel spaces near door; map shows locations with probable signs; this prioritizes cleaning; protecting guests; protecting staff.
Monthly narrative presents themselves as evidence of program value; customers said cleanliness improved; hotel staff reported a calmer night experience; higher confidence reduces complaints about room readiness.
Hundreds of checks build trend data; higher data quality reduces uncertainty; clearer picture supports faster decisions.
 Why I’ve Changed My Mind About Cruise Gratuities">
 Can’t Decide Where to Travel Next? 16 Ideas to Help You Choose Your Destination">
 Why Your Favorite Cruise Line Won’t Go Out of Business Despite the COVID Shutdown">
 Get More Benefits as a Tier and Companion Pass® Member – Maximize Perks, Upgrades, and Rewards">
 Countries You Cannot Enter With a Criminal Record – A Complete Guide to Visa Restrictions">
 Beware of This Costly TSA PreCheck Application Scam — How to Protect Yourself">
 Does Being an Authorized User on Someone Else’s Credit Card Actually Build Your Credit Score?">
 Expired Face Mask Requirements for Kids Flying on Planes During COVID-19">
 When to Consider a Secured Credit Card – A Practical Guide to Building Credit">
 Dining Rewards – Earn More, Save More at Restaurants">


